By Pritam Singh, QC Coating Inspector
Tank internal coating inspection is one of the most critical activities in oil & gas facilities. Unlike external coatings, internal tank coatings are exposed to immersion service, aggressive chemicals, hydrocarbons, and produced water.
From my 11 years of field experience, I can confidently say:
Most tank coating failures occur due to poor surface preparation, inadequate environmental control, or incomplete holiday testing.
This article explains the complete step-by-step tank internal coating inspection procedure used in oil & gas projects.
Why Tank Internal Coating Inspection Is Critical
Internal coatings must:
✔ Prevent corrosion
✔ Resist chemical attack
✔ Avoid contamination of stored product
✔ Maintain long-term integrity
Repairing internal tank coatings requires shutdown, cleaning, scaffolding, and confined space entry — making prevention through proper inspection essential.
Step 1: Specification & Documentation Review
Before starting work, I verify:
- Approved coating system (e.g., epoxy phenolic, novolac epoxy)
- Required surface cleanliness (Sa 2½ or Sa 3)
- Surface profile range
- Minimum and maximum DFT
- Holiday testing voltage requirements
- Curing and immersion period
- Inspection & Test Plan (ITP)
Internal tank systems typically require stricter standards than external coatings.
Step 2: Surface Preparation Inspection
Surface preparation determines coating performance.
🔹 Cleanliness Grade
Most tank internals require:
- Sa 2½ (Near-White Metal Blast Cleaning)
- Sa 3 (White Metal) for severe immersion service
Reference standards:
- ISO 8501-1
- AMPP SP10 (formerly NACE No.2)
Visual comparison with standard photographs is mandatory.
🔹 Surface Profile
Typical requirements:
- 50–75 µm for standard epoxy
- 75–100 µm for high-build immersion systems
Measured using replica tape in accordance with ASTM D4417.
Profile must align with coating manufacturer recommendation.
🔹 Weld & Edge Preparation
Critical checkpoints:
✔ Weld spatter removed
✔ Sharp edges rounded (minimum 2 mm radius)
✔ Undercuts repaired
✔ Surface defects corrected
Most tank failures initiate at welds.
🔹 Soluble Salt Testing
Internal immersion coatings are highly sensitive to chloride contamination.
If required, perform salt testing (ISO 8502 series) before coating application.
Step 3: Environmental Monitoring
Tank interiors are confined spaces where humidity can increase rapidly.
Before and during application, measure:
- Air temperature
- Steel surface temperature
- Relative humidity
- Dew point
Requirement:
Steel temperature must be at least 3°C above dew point.
High humidity may cause:
- Amine blush
- Poor curing
- Adhesion failure
Environmental readings must be recorded periodically.
Step 4: Coating Material Verification
Before mixing:
✔ Confirm correct product
✔ Verify batch number
✔ Check shelf life
✔ Confirm mixing ratio
✔ Observe induction time
Incorrect mixing is one of the top causes of internal tank coating failure.
Step 5: Application Inspection
During application, inspect:
✔ Proper spray technique
✔ Uniform coverage
✔ Stripe coating on welds and edges
✔ Wet Film Thickness (WFT)
Stripe coat is mandatory for:
- Weld seams
- Corners
- Nozzle penetrations
Step 6: Dry Film Thickness (DFT) Inspection
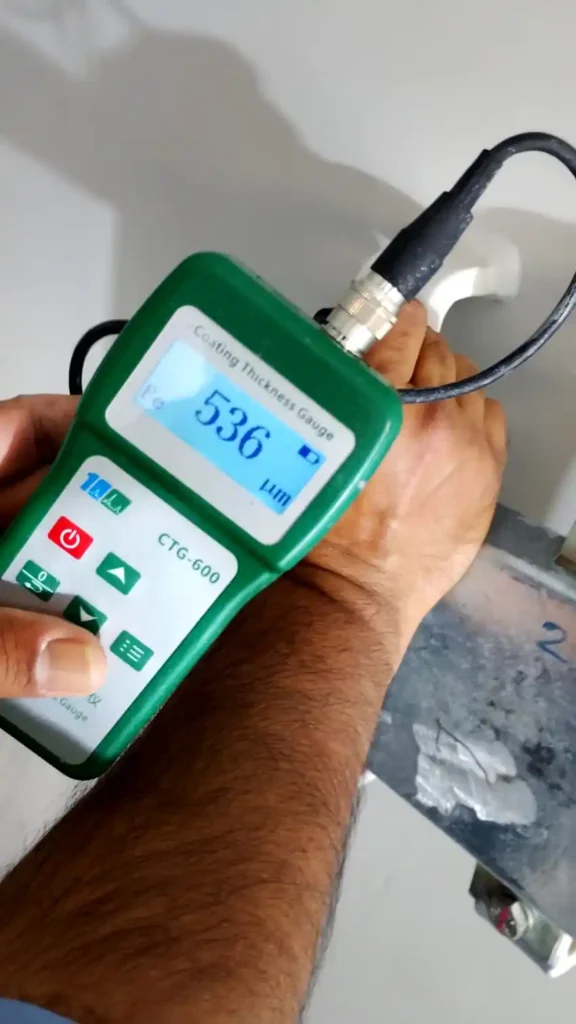
After curing, measure DFT using calibrated gauge.
Reference:
- ASTM D7091
- ISO 19840
Verify:
✔ Minimum thickness achieved
✔ Maximum thickness not exceeded
✔ Required number of spot measurements
Excess thickness can lead to solvent entrapment and cracking.
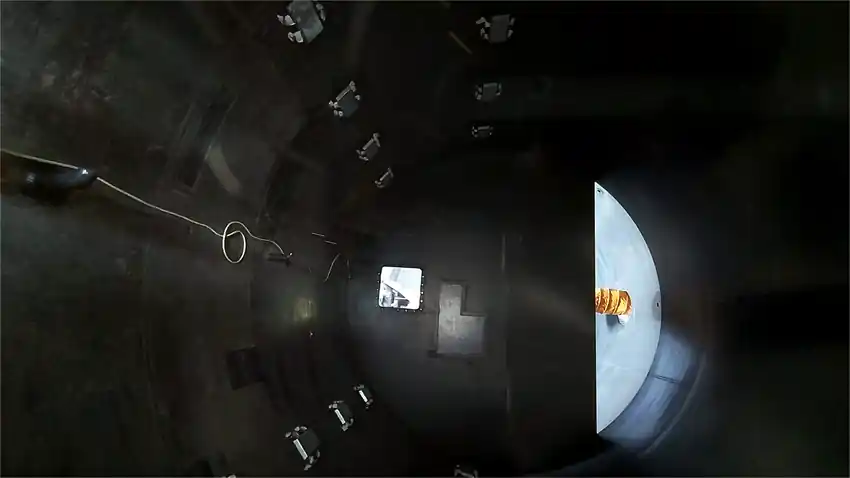
Step 7: Holiday Testing (Critical for Immersion Service)
Holiday testing is mandatory for tank internals.
Reference:
- ASTM D5162
- AMPP SP0188
Procedure:
✔ Use high-voltage spark tester
✔ Set voltage based on coating thickness
✔ Test 100% of coated surface
All discontinuities must be repaired and re-tested.
This is the final barrier against corrosion.
Holiday Test in Painting: Definition, Types, and Importance
Step 8: Final Visual Inspection
Inspect for:
✔ Blisters
✔ Pinholes
✔ Runs and sags
✔ Cracks
✔ Amine blush
✔ Missed areas
Defects must be repaired according to approved repair procedure.
Step 9: Curing & Immersion Time Verification
Before placing tank into service:
✔ Confirm minimum curing time
✔ Confirm immersion cure period
✔ Perform hardness check if required
Filling tank before full cure can destroy coating performance.
Common Causes of Tank Internal Coating Failure
From my field investigations, major root causes include:
- Poor blast cleanliness
- High humidity during application
- Incorrect mixing ratio
- Skipping holiday testing
- Insufficient curing time
Internal tank coatings demand strict inspection discipline.
Practical Tank Internal Inspection Checklist
Before approval, confirm:
✔ Surface preparation accepted
✔ Environmental readings compliant
✔ DFT within specification
✔ 100% holiday testing completed
✔ Repairs re-tested
✔ Curing period achieved
✔ Documentation signed
Only then should tank be released for service.
Applicable Standards & References
Tank internal coating inspection should comply with:
- ISO 8501-1 – Surface cleanliness
- ASTM D4417 – Surface profile measurement
- ASTM D7091 – DFT measurement
- ASTM D5162 – Holiday testing
- ISO 19840 – DFT acceptance
- ISO 12944 – Protective coating systems
- AMPP SP10 – Near-White Metal Blast Cleaning
Compliance with recognized standards enhances long-term coating reliability.
Conclusion
Tank internal coating inspection is not just a checklist activity — it is a controlled process.
The most critical stages are:
1️⃣ Surface preparation
2️⃣ Environmental control
3️⃣ Thickness verification
4️⃣ Holiday testing
5️⃣ Proper curing
From my experience, strict inspection during these stages prevents costly failures and ensures reliable tank service life.
FAQ
Tank internal coatings are usually exposed to immersion service. Even a small pinhole or discontinuity can allow corrosion to start beneath the coating. High-voltage holiday testing ensures 100% coating integrity before the tank is put into service.
Most oil & gas tank internals require:
Sa 2½ (Near-White Metal Blast Cleaning)
Sa 3 (White Metal) for severe chemical or immersion service
The requirement depends on project specification and coating manufacturer recommendations.
Typical profile ranges are:
50–75 µm for standard epoxy systems
75–100 µm for high-build immersion coatings
Always verify profile using replica tape as per ASTM D4417.
Tank interiors are confined spaces where humidity can rise quickly. High relative humidity or insufficient temperature difference from dew point can cause:
Amine blush
Poor curing
Adhesion failure
Steel temperature must be at least 3°C above dew point.
Stripe coating is an additional brush-applied coat applied to welds, edges, and corners before full spray coating. These areas are prone to low film thickness and early corrosion, so stripe coating ensures adequate protection.
Dry Film Thickness (DFT) is measured using a calibrated non-destructive gauge in accordance with ASTM D7091. Multiple spot readings must be taken to verify compliance with minimum and maximum thickness requirements.
Yes, especially for immersion service tanks. Chloride contamination can accelerate corrosion under the coating. Soluble salt testing should be performed if required by specification.