Before painting steel, you need to ensure the surface is clean to make the paint stick well and last long. Water-soluble salts, like chlorides, can cause rust, blisters, or peeling if left on the surface. The ISO 8502-9:2020 standard provides a simple field method to check for these salts using a conductivity test. This article explains how to test for salts on steel surfaces in an easy-to-follow way, including an example calculation for clarity.
How to Conduct the Blotter Test for Clean Compressed Air
Why Salt Contamination Matters
Salts on steel can ruin paint jobs by causing corrosion or blisters under the coating. Even after cleaning rusty steel, salts can hide in tiny pits, making it hard for paint to stick properly. Testing for salts helps ensure the surface is clean enough for painting, preventing future problems.
This method measures the total amount of water-soluble salts by dissolving them in water and checking how conductive the water becomes. It doesn’t identify specific salts but focuses on the ones that cause the most damage.
Equipment You’ll Need
Here’s what you need to perform the test:
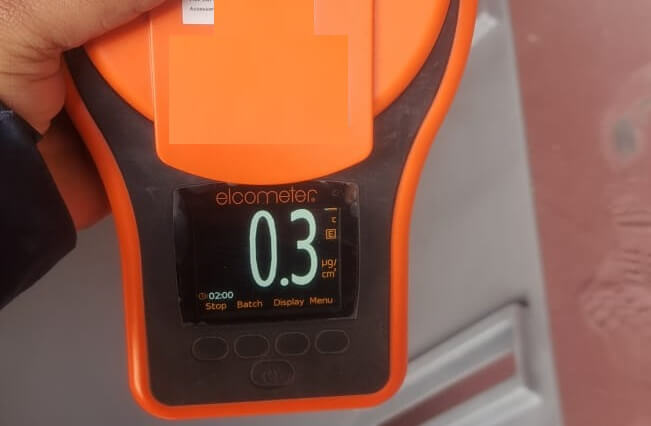
- Conductivity Meter: A device to measure how conductive the water is. It should be accurate, with a range of 0 to 200 mS/m, and set to 25 °C.
- Glass Beaker: A small container to hold water during testing. Glass is best to avoid static issues.
- Adhesive Cell: A patch to stick on the steel and hold water for testing (as described in ISO 8502-6).
- Syringe: To inject and collect water during the test. Use the same syringe for all steps.
- Pure Water: Very clean water (distilled or deionized) with low conductivity (less than 0.5 mS/m).
Step-by-Step Guide
Follow these steps to check for salts on a steel surface:
1. Set Up the Conductivity Meter
Turn on the conductivity meter and calibrate it following the manufacturer’s instructions. Do this before every test or at least once a day to ensure accurate results.
2. Do a Blank Test
Check that your equipment and water are clean with a blank test:
- Pour 10–15 ml of pure water into the glass beaker.
- Fill the syringe with water from the beaker.
- For meters with electrodes, pour the syringe water back into the beaker, dip the electrodes in, and stir gently. For other meters, squirt water from the syringe onto the sensor.
- Note the conductivity reading (called γ₁). This shows if the water or equipment has any contamination.
3. Collect Salts from the Steel
Use the adhesive cell method to get salts off the steel:
- Stick an adhesive cell onto the steel surface to seal a small area.
- Inject a known amount of pure water into the cell to dissolve any salts.
- Move the water around in the cell, then suck it back into the syringe.
- Write down the area of the cell and the amount of water used (called Vₑ).
4. Measure the Conductivity
Test the water you collected:
- For meters with electrodes, pour the collected water into the beaker and dip the electrodes in. If you need to dilute the water, add more pure water and note how much you added (Vₐ and Vₛ).
- For other meters, rinse the sensor with the collected water, then apply some to the sensor.
- Write down the new conductivity reading (γ₂).
- Clean the beaker, syringe, and meter between tests to avoid mixing old and new samples.
5. Calculate the Salt Amount
Figure out how much salt is on the surface:
- Corrected Volume: If you diluted the water, calculate the corrected volume (V) with this formula:
[
V = V_e \times \frac{V_s + V_a}{V_s}
]- Vₑ: Water used to collect salts.
- Vₛ: Water sampled from the collection.
- Vₐ: Extra water added for dilution.
- Surface Density: Calculate the salt density (ρₐ) using:
`:
[
\rho_A = \frac{m}{A}
]- m: The mass of salts, based on the conductivity difference (γ₂ – γ₁) and a standard factor.
- A: The area of the adhesive cell.
- The result shows the amount of salts in mg/m², telling you how clean the surface is.
Example Calculation
Suppose you’re using a standard adhesive patch (A-1250, area = 0.00125 m²) and the following measurements:
- Vₑ = 15 ml (water used for extraction).
- Vₛ = 10 ml (sampled water).
- Vₐ = 5 ml (added water for dilution).
- γ₁ = 0.2 mS/m (blank test conductivity).
- γ₂ = 2.0 mS/m (sample conductivity).
- Conversion factor (from ISO 8502-9) = 0.4 mg/(mS/m) for mass calculation.
Step 1: Calculate Corrected Volume
[
V = V_e \times \frac{V_s + V_a}{V_s} = 15 \times \frac{10 + 5}{10} = 15 \times 1.5 = 22.5 , \text{ml}
]
Step 2: Calculate Mass of Salts
[
m = (\gamma_2 – \gamma_1) \times V \times \text{conversion factor}
]
[
m = (2.0 – 0.2) \times 22.5 \times 0.4 = 1.8 \times 22.5 \times 0.4 = 16.2 , \text{mg}
]
Step 3: Calculate Surface Density
[
\rho_A = \frac{m}{A} = \frac{16.2}{0.00125} = 12960 , \text{mg/m}^2 , \text{or} , 12.96 , \text{mg/cm}^2
]
This result (12.96 mg/cm²) indicates the salt level on the surface, which you can compare to acceptable limits for your painting project.
6. Record Your Results
Write a report with:
- The area tested and water used.
- The conductivity readings (γ₁ and γ₂).
- The calculated salt density (ρₐ).
- Any notes about the equipment or test process.
Things to Keep in Mind
This method is great for finding harmful salts, but it has limits:
- It only measures salts that dissolve in water, not all possible contaminants.
- Some salts in deep pits might not come out easily. Doing the test longer or repeating it can help.
- Always clean equipment carefully to avoid false results.
For more details, check out the full ISO 8502-9:2020 standard.
Conclusion
Testing for salts on steel before painting is key to a strong, lasting coating. The ISO 8502-9 method makes it easy to measure salt contamination using a conductivity meter and adhesive cells. By calibrating your equipment, doing a blank test, collecting salts, measuring conductivity, calculating the results (like in the example above), and keeping good records, you can ensure the steel is clean enough for painting. Follow the steps carefully for reliable results.