By Pritam Singh, QC Coating Inspector
In my 11 years of experience in oil & gas coating inspection, I have seen that epoxy coating performance depends more on inspection control than on product quality. Even the best epoxy system can fail if surface preparation, mixing, application, or curing conditions are not properly monitored.
This article explains the complete step-by-step epoxy coating inspection procedure I follow on site — from surface preparation to final acceptance.
Why Epoxy Coating Inspection Is Critical
Epoxy coatings are widely used for:
- Structural steel
- Pipelines
- Tanks
- Offshore platforms
- Process piping
They provide excellent:
✔ Corrosion resistance
✔ Chemical resistance
✔ Mechanical durability
However, epoxy systems are sensitive to:
- Surface contamination
- Incorrect mixing ratio
- High humidity
- Improper curing conditions
Proper inspection ensures long-term coating performance.
Step 1: Documentation Review (Before Work Starts)
Before coating begins, I verify:
✔ Approved coating specification
✔ Project ITP (Inspection & Test Plan)
✔ Coating manufacturer Product Data Sheet (PDS)
✔ Material approval documents
✔ Batch numbers and expiry dates
✔ Calibration certificates for instruments
Never start coating without document verification.
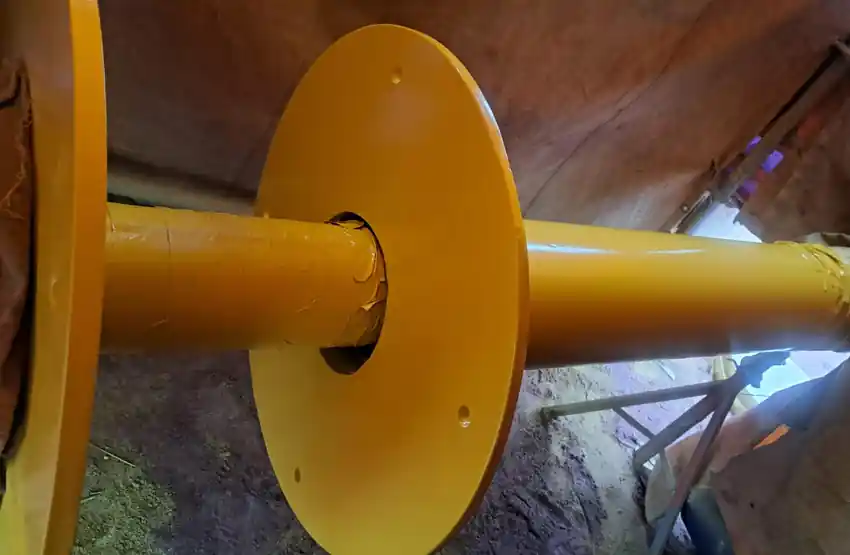
Step 2: Surface Preparation Inspection
Epoxy performance depends heavily on surface preparation.
I check:
🔹 Cleanliness Grade
Typically:
- Sa 2½ (Near-White Metal) for most oil & gas projects
- Sa 3 for severe marine or immersion service
🔹 Surface Profile
Usually:
- 50–75 µm for standard epoxy
- 75–100 µm for high-build systems
Measured using replica tape or depth gauge.
🔹 Dust Level
Conduct dust test to ensure no loose contamination.
🔹 Soluble Salts
If required, perform chloride test to ensure within specified limits.
No primer application is allowed until surface preparation is accepted.
Step 3: Environmental Condition Monitoring
Before and during application, I record:
✔ Air temperature
✔ Steel surface temperature
✔ Relative humidity
✔ Dew point
Requirement:
Steel temperature must be at least 3°C above dew point.
High humidity can cause:
- Blushing
- Poor curing
- Adhesion failure
Environmental readings are recorded before coating and periodically during application.
Step 4: Paint Material Inspection
Before mixing epoxy, I verify:
✔ Correct material (base + hardener)
✔ Mixing ratio as per PDS
✔ Shelf life validity
✔ Proper storage conditions
Epoxy coatings are two-component systems. Incorrect mixing ratio leads to:
- Soft film
- Incomplete curing
- Early failure
Step 5: Mixing and Induction Time
Epoxy coatings require proper mixing:
✔ Use mechanical mixer
✔ Mix for recommended duration
✔ Observe induction time (if specified)
Induction time allows chemical reaction to start before application.
Skipping induction time may result in improper curing.
Step 6: Application Inspection
During application, I monitor:
✔ Spray technique
✔ Uniform coverage
✔ Wet Film Thickness (WFT)
WFT is checked to ensure final Dry Film Thickness (DFT) will meet specification.
Poor spray technique can cause:
- Runs and sags
- Pinholes
- Uneven thickness
Step 7: Dry Film Thickness (DFT) Measurement
After curing, DFT is measured using calibrated DFT gauge.
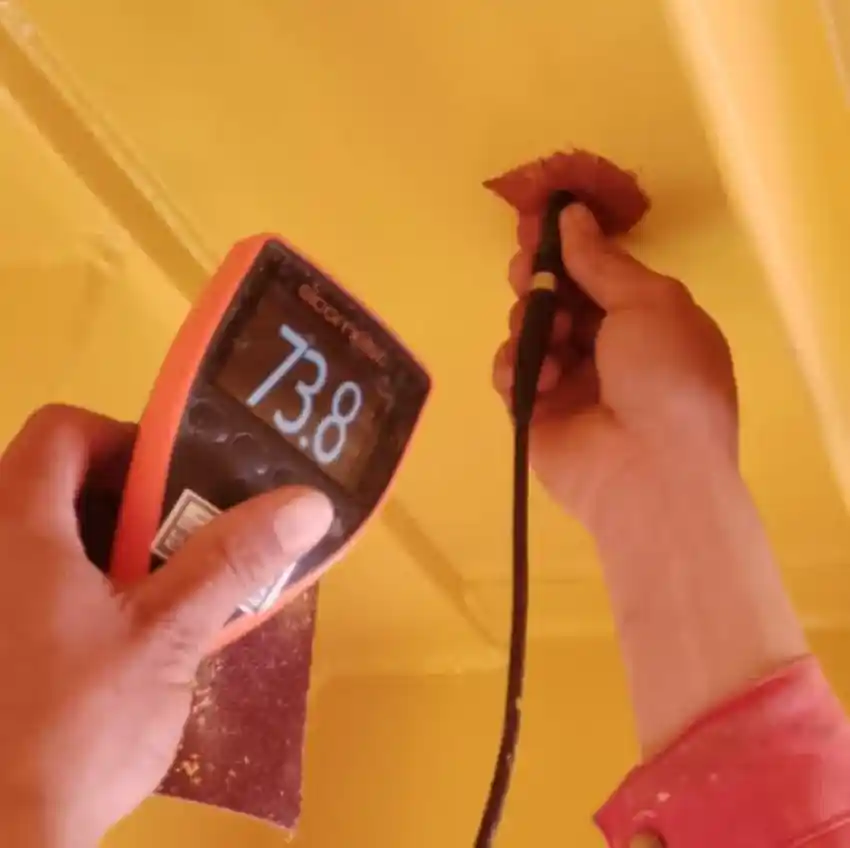
I follow:
✔ Minimum spot measurements
✔ Average thickness requirement
✔ Maximum thickness limits
Too low DFT:
- Reduced corrosion protection
Too high DFT:
- Cracking
- Solvent entrapment
Step 8: Holiday / Pinhole Testing (If Required)
For tanks or immersion service:
✔ Perform holiday test
✔ Check for coating discontinuities
Any defects must be repaired as per procedure.
Step 9: Visual Inspection
Final inspection includes checking for:
✔ Runs
✔ Sags
✔ Orange peel
✔ Dry spray
✔ Blistering
✔ Missed areas
Touch-up areas must follow approved repair procedure.
Step 10: Curing Verification
Epoxy curing depends on temperature.
I verify:
✔ Minimum curing time
✔ Hardness check (if required)
✔ Recoat window compliance
Applying next coat outside recoat window may require surface roughening.
Common Epoxy Coating Defects
- Amine blush
- Pinholes
- Cracking
- Delamination
- Solvent entrapment
- Dry spray
Most of these are caused by poor environmental control or incorrect application thickness.
My Practical Site Checklist
Before approving epoxy coating, I confirm:
✔ Surface preparation accepted
✔ Environmental conditions compliant
✔ Correct mixing ratio
✔ DFT within specification
✔ No visible defects
✔ All inspection records completed
Only then do I release the area.
Conclusion
Epoxy coating inspection is a systematic process — not just checking DFT at the end.
From my field experience, the most critical factors are:
1️⃣ Surface preparation quality
2️⃣ Environmental control
3️⃣ Correct mixing ratio
4️⃣ Proper thickness control
If these are managed properly, epoxy systems perform reliably for years.
FAQ
Because epoxy relies on mechanical bonding created by proper surface profile.
Steel temperature must be at least 3°C above dew point.
It can cause soft coating, incomplete curing, and early failure.
Using a calibrated dry film thickness gauge after curing.
The waiting time after mixing before application to allow chemical reaction to begin.
Please make video on article u have on your website
Thank you for your comment.
As a QC Coating Inspector, I understand that visual demonstrations help professionals better understand inspection procedures. I will prepare a practical site-based video explaining this article in detail, including tools, standards references, and real inspection examples.
Stay connected for updates.