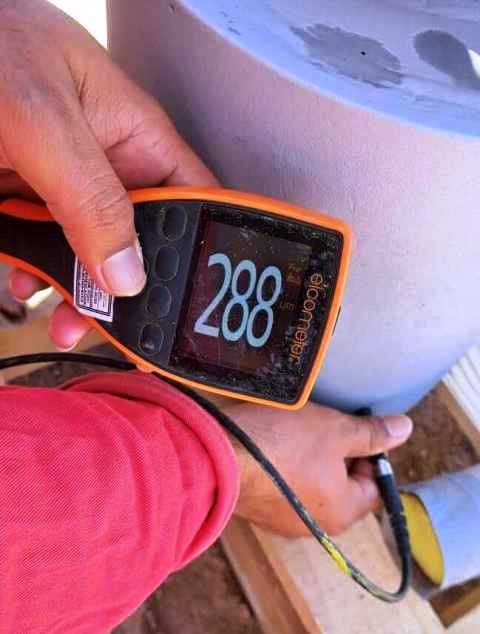
Dry Film Thickness (DFT) calibration ensures precise coating thickness measurement, a critical factor in industries like automotive, aerospace, marine, and construction. Properly calibrated DFT gauges deliver reliable results, guaranteeing quality, compliance, and cost efficiency. This guide explores what DFT calibration is, why it matters, how to perform it, and best practices for success.
How to Check Pressure at the Blasting Nozzle: A Complete Guide
What is DFT Calibration?
DFT calibration is the process of adjusting a dry film thickness gauge to measure coating thickness accurately. Coatings, such as paint, powder, or galvanizing, are applied to substrates like steel or aluminum, and their thickness—measured in micrometers (µm) or mils (1 mil = 25.4 µm)—affects performance. DFT gauges, using magnetic, eddy current, or ultrasonic methods, require calibration to account for substrate properties, coating types, and environmental factors.
By aligning measurements with certified calibration standards, DFT calibration ensures accuracy, reducing errors that could compromise product quality or regulatory compliance.
Why DFT Calibration Matters
Accurate coating thickness measurement is essential for several reasons:
- Quality Control: Proper DFT prevents issues like corrosion from thin coatings or cracking from overly thick ones, ensuring durability.
- Regulatory Compliance: Standards like ISO 2178, ASTM D7091, and SSPC-PA 2 set DFT requirements. Calibration ensures adherence, avoiding penalties.
- Cost Savings: Precise measurements minimize material waste, optimizing coating application without sacrificing protection.
- Asset Longevity: Correct DFT extends the lifespan of assets like pipelines, vehicles, or bridges by enhancing resistance to wear and environmental damage.
How to Perform DFT Calibration: A Step-by-Step Guide
Calibrating a DFT gauge is straightforward with the right approach. Follow these steps for reliable coating thickness measurement:
- Choose Calibration Standards: Use certified coated panels or plastic shims with known thicknesses, matching the job’s substrate and coating.
- Set Up the Gauge: Ensure the DFT gauge is clean, powered, and configured for the substrate (ferrous for steel, non-ferrous for aluminum).
- Zero Calibration: Place the probe on an uncoated substrate (zero plate) to establish a baseline, accounting for surface properties.
- Measure Standards: Take readings on calibration standards, adjusting the gauge to match their known thicknesses. Many modern gauges automate this step.
- Verify Accuracy: Test multiple points on the standards to confirm consistent readings. Recalibrate if discrepancies arise.
- Document the Process: Record calibration details—date, standards used, and settings—for traceability and compliance.
Best Practices for Effective DFT Calibration
To optimize coating thickness measurement, follow these tips:
- Match Materials: Use calibration standards that mirror the job’s substrate and coating for accurate results.
- Calibrate Regularly: Perform calibration before each major project or shift, as temperature or humidity can affect gauges.
- Ensure Clean Surfaces: Remove dirt, oil, or rust from substrates and standards to prevent measurement errors.
- Measure Multiple Points: Take readings across different areas to account for surface variations.
- Maintain Equipment: Inspect and service DFT gauges regularly to ensure long-term accuracy.
Common Challenges in DFT Calibration
Even with proper procedures, challenges can arise:
- Substrate Variability: Curved surfaces or thin materials may require specialized probes for accurate readings.
- Operator Errors: Inconsistent probe placement or pressure can skew results, highlighting the need for training.
- Environmental Interference: Extreme temperatures or magnetic fields can disrupt gauge performance, necessitating controlled conditions.
Modern Advances in DFT Calibration Technology
Today’s DFT gauges simplify calibration with cutting-edge features. Automatic substrate detection, digital displays, and built-in calibration routines reduce errors, while wireless connectivity enables real-time data logging. Advanced probes handle complex surfaces, making coating thickness measurement faster and more reliable, even in demanding environments.
Conclusion
DFT calibration is the foundation of accurate coating thickness measurement, ensuring quality, compliance, and efficiency across industries. By following a standardized process, adopting best practices, and leveraging modern DFT gauges, professionals can achieve precise results that protect assets and optimize performance. Whether you’re coating a car, a ship, or a skyscraper, mastering DFT calibration is a small step with big rewards.
Ready to improve your coating process? Explore the latest DFT gauges and calibration standards to elevate your quality control.
