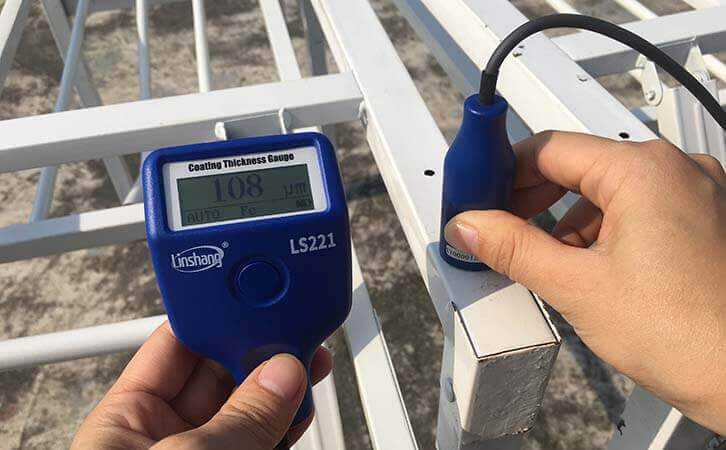
Introduction
DFT calibration is a critical inspection activity used to ensure the accuracy of a Dry Film Thickness (DFT) gauge. In coating inspection, incorrect DFT readings can lead to coating failure, corrosion issues, and rejection of work. Proper calibration confirms that the gauge is measuring coating thickness correctly as per project and international standards.
This guide explains what DFT calibration is, its types, and the standard calibration procedure followed on Oil & Gas and industrial projects.
What Is DFT Calibration?

DFT calibration is the process of adjusting and verifying a DFT gauge so that it provides accurate coating thickness readings on coated surfaces.
In simple terms:
DFT calibration ensures the gauge reading matches the actual coating thickness.
Calibration is required before inspection, after probe change, and whenever measurement accuracy is in doubt.
Why Is DFT Calibration Important?
- Ensures compliance with project specifications
- Prevents over-coating and under-coating
- Improves inspection reliability
- Meets international coating standards
- Avoids rework and coating failure
Types of DFT Calibration
1. Factory Calibration
Factory calibration is performed by the manufacturer or an accredited laboratory using traceable reference standards.
Key points:
- Valid for 6 to 12 months
- Certificate is issued
- Required by standards such as ISO 19840
- Does not replace field calibration
2. Field (Operational) Calibration
Field calibration is carried out by the coating inspector at site before using the gauge.
Tools used:
- Bare (uncoated) substrate
- Certified calibration foils (shims)
This type of calibration is mandatory as per SSPC-PA 2 and ASTM D7091.
3. Verification of Accuracy (Calibration Check)
Verification is a quick accuracy check performed during inspection to confirm the gauge remains within tolerance.
- No adjustment required unless readings are out of range
- Usually done using known thickness shims
Types of DFT Gauges
Magnetic DFT Gauge (Type 1)
- Used on carbon steel
- Works on magnetic attraction principle
- Mechanical or basic electronic models
Electronic DFT Gauge (Type 2)
- Used on ferrous and non-ferrous metals
- Uses magnetic induction and eddy current
- Most common in Oil & Gas projects
DFT Calibration Procedure (Step by Step)
Step 1: Probe Cleaning
Ensure the probe tip is clean and free from:
- Dust
- Oil
- Paint residue
A dirty probe can cause incorrect readings.
Step 2: Zero Calibration
- Place the probe on a bare, uncoated substrate
- Substrate must be similar to the job surface (material, curvature, roughness)
- Adjust the gauge to read zero (0 µm)
Step 3: Shim (Foil) Calibration
- Place a certified calibration foil on the bare substrate
- Measure the thickness through the foil
- Compare the reading with the foil value
- Adjust the gauge if necessary
Best practice:
Use at least two or three foils covering the expected coating thickness range.
Step 4: Verification
- Take multiple readings (minimum three)
- Average reading must fall within acceptable tolerance:
- ±5 µm for thin coatings
- ±10 µm or ±5% for thicker coatings
Step 5: Record Calibration Details
Calibration data should be recorded in the inspection report, including:
- Gauge model and serial number
- Shim values used
- Date and time
- Inspector name
Common DFT Calibration Mistakes
- Calibrating on smooth steel while measuring blasted surfaces
- Skipping zero calibration
- Using damaged or uncertified shims
- Not recalibrating after probe change
- Ignoring surface profile effects
Applicable Standards for DFT Calibration
- SSPC-PA 2
- ASTM D7091
- ISO 19840
Conclusion
DFT calibration is an essential part of coating inspection that ensures accurate thickness measurement and compliance with international standards. Proper calibration improves inspection quality, reduces coating failures, and supports long-term asset protection in industrial and Oil & Gas environments.