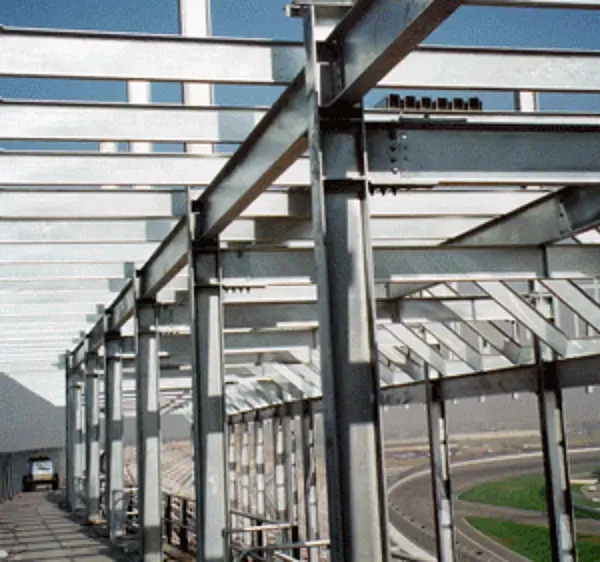
Hot-dip galvanizing is one of the most widely used corrosion protection methods for steel structures, fabricated assemblies, and industrial steelwork. The ASTM A123/A123M specification defines the minimum requirements for zinc (hot-dip galvanized) coatings on iron and steel products—covering scope, coating thickness grades, finish/appearance, sampling, test methods, repair limits, and acceptance criteria.
This guide breaks down ASTM A123 in a practical, inspector-friendly way—so you can apply it in QA/QC, coating inspection, and site acceptance.
Note: ASTM A123 has newer editions beyond the 2002 version you shared (A123/A123M-24 is listed on ASTM’s site). Always confirm the project’s required revision in the contract.
Coating Inspection Procedure Guide
1) Scope: What ASTM A123 Covers (and Excludes)
Covered steel products (batch galvanizing)
ASTM A123 applies to hot-dip galvanizing on iron and steel products made from:
- Rolled, pressed, and forged shapes
- Castings
- Plates, bars, and strips
- Unfabricated and fabricated items (structural fabrications, assembled steel products, bent/welded tubes before galvanizing, fabricated wire work)
Not covered by ASTM A123
This standard does not apply to:
- Wire, pipe, tube, or steel sheet galvanized on specialized/continuous lines
- Steel thinner than 22 gauge (0.76 mm)
Related ASTM standards you must reference
- ASTM A153/A153M: hot-dip galvanizing for hardware/fasteners that are centrifuged
- ASTM A767/A767M: zinc-coated reinforcing steel bars
- ASTM A780: repair (renovation) of damaged/uncoated areas
- ASTM E376 / A90 / B487: coating thickness measurement methods
2) Key Definitions Inspectors Must Understand
Single-specimen vs multi-specimen articles
- Single-specimen article: surface area ≤ 160 in² (or centrifuged items). Entire surface = one specimen.
- Multi-specimen article: surface area > 160 in². Divide into three continuous sections, each section = one specimen (for thickness testing).
Specimen coating thickness
For each specimen, take five or more thickness readings, widely dispersed, and average them. That average = specimen coating thickness.
3) Minimum Coating Thickness Grades (ASTM A123 Table 1)
Coating thickness requirements depend on:
- Material category (structural shapes, strip/bar, pipe/tubing, wire)
- Measured steel thickness range
Common practical keywords: ASTM A123 coating thickness, galvanized coating thickness requirements, hot dip galvanizing thickness microns, zinc coating inspection.
Minimum average coating thickness grade (summary)
| Material category | <1/16 in | 1/16–<1/8 | 1/8–3/16 | >3/16–<1/4 | ≥1/4 |
|---|---|---|---|---|---|
| Structural shapes & plate | 45 | 65 | 75 | 85 | 100 |
| Strip & bar | 45 | 65 | 75 | 85 | 100 |
| Pipe & tubing | 45 | 45 | 75 | 75 | 75 |
| Wire | 35 | 50 | 60 | 65 | 80 |
How acceptance works (critical)
- All specimens tested must meet the required average coating thickness grade for their category/thickness.
- Any individual specimen is allowed to be one grade lower than the Table 1 requirement (minimum specimen allowance).
- A few thin readings do not automatically fail the job—only the specimen average and article/sample averages control acceptance (as per the standard’s method).
For a clear industry explanation of ASTM A123 thickness requirements and inspection logic, see the American Galvanizers Association overview.
4) Finish & Appearance Requirements (Visual Acceptance)
ASTM A123 requires the coating to be:
- Continuous
- Reasonably smooth and uniform (as practical for shape/handling)
- Free from:
- Uncoated areas
- Blisters
- Flux deposits
- Gross dross inclusions
- No heavy zinc lumps/projections that interfere with intended use
- Holes ≥ 1/2 in should be reasonably clean and usable
Tip for inspectors: marks from handling (tongs/straps) are acceptable unless they expose base metal and exceed allowable repair limits.
5) Repair (Renovation) Limits Using ASTM A780
Uncoated or damaged areas can be repaired only within limits:
- Each repair area must be ≤ 1 in (25 mm) in its narrowest dimension
- Total repair area per article must be the lesser of:
- 0.5% of accessible surface area, or
- 36 in² per short ton of piece weight
- Repair thickness must meet the required grade; if using zinc paint, thickness should be 50% higher than Table 1 requirement, but not over 4.0 mils
- If repair exceeds limits (or is inaccessible) → reject the coating
6) Sampling: How Many Pieces to Inspect Per Lot
If not otherwise agreed, ASTM A123 uses the following minimum sample sizes:
| Pieces in lot | Specimens |
|---|---|
| 3 or less | all |
| 4 to 500 | 3 |
| 501 to 1,200 | 5 |
| 1,201 to 3,200 | 8 |
| 3,201 to 10,000 | 13 |
| 10,001+ | 20 |
7) Coating Thickness Test Methods (How Inspectors Measure)
ASTM A123 allows three main approaches (plus microscopy):
1) Magnetic thickness gauge (most common)
- Use ASTM E376
- Take 5+ readings per specimen, widely dispersed
- Best for most structural steel and fabrications
2) Stripping method (destructive)
- Use ASTM A90/A90M
- Converts coating mass to thickness grade
3) Weigh before and after galvanizing
- Weigh after pickling/drying and after cooling
- Calculate coating weight per area → convert to thickness grade
4) Microscopy cross-section (destructive)
- Use ASTM B487
- Take 5+ dispersed cross-section measurements and average
8) Inspection, Rejection & Retest (Real-World QA/QC Flow)
- The galvanizer is responsible for compliance via in-plant inspection.
- The purchaser/third-party may inspect at the plant and has access during contract work.
- If rejected (not embrittlement), the lot may be:
- Sorted (remove nonconforming pieces)
- Repaired within limits
- Stripped and regalvanized, then resubmitted
