Abrasives are critical in abrasive blast cleaning, a process used to prepare surfaces for coating or painting. However, oil contamination in abrasives can compromise the quality of the cleaned surface, leading to coating adhesion issues, film defects, and reduced performance of the coating system. To ensure the integrity of the abrasive material, the ASTM D7393-16 Standard Practice provides a straightforward method to detect oil in abrasives. This article outlines the step-by-step procedure, its significance, and key considerations for conducting the test effectively.
Why Check for Oil in Abrasives(vial test)?
Oil in abrasives can transfer to the surface during blast cleaning, contaminating it and affecting the coating’s performance. The ASTM D7393 standard highlights that oil contamination is a critical cleanliness test required by several SSPC standards, including:
- SSPC-AB 1 for mineral and slag abrasives
- SSPC-AB 2 for recycled ferrous abrasives
- SSPC-AB 3 for new ferrous abrasives
- SSPC-AB 4 for recyclable encapsulated abrasive media
Detecting and addressing oil contamination ensures the abrasive is suitable for use, preventing costly rework and ensuring a high-quality surface preparation.
Equipment and Materials Needed
To perform the oil detection test, you’ll need the following:
- Container: A clear jar or bottle with a capacity of at least 250 ml (8.5 fl oz) and a lid that seals tightly to prevent leaks during shaking.
- Water: Potable water, suitable for the test, with a temperature between 20 and 35°C (68 and 95°F).
Step-by-Step Procedure
The ASTM D7393 standard outlines a simple yet effective procedure to check for oil in abrasives. This method can be conducted in various settings, including laboratories, field sites, blast and paint shops, or steel fabrication shops. Follow these steps:
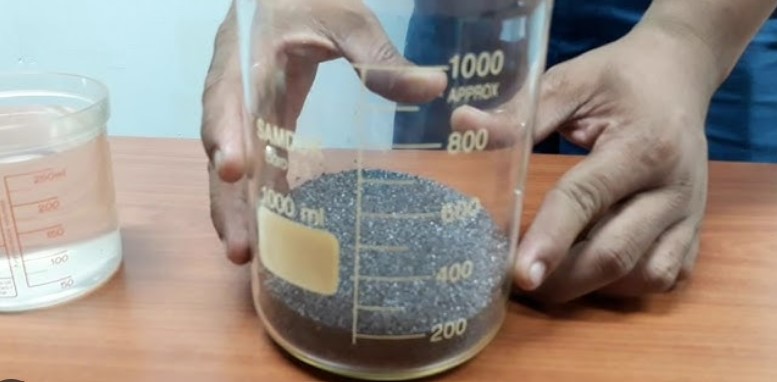
- Prepare the Container: Place a sample of the abrasive into a clean container, filling it to about half its height.
- Add Water: Pour potable water into the container until it covers the abrasive by at least 2.5 cm (1 inch). Ensure the water temperature is between 20 and 35°C (68 and 95°F).
- Shake the Container: Secure the lid tightly and shake the container vigorously for one minute. This action helps dislodge any oil present in the abrasive.
- Let It Settle: Remove the lid and allow the container to sit for up to 5 minutes. This resting period allows any oil to rise to the surface.
- Inspect for Oil: Examine the water surface for signs of oil, such as droplets or a sheen. The presence of either indicates oil contamination.
- Interpret Results: If oil is visible, the abrasive fails the test. You should either clean the abrasive and retest or discard the contaminated supply.
How to Conduct the Blotter Test for Clean Compressed Air
Testing Frequency
The frequency of testing depends on the agreement between the purchaser and seller. However, ASTM D7393 suggests the following guidelines:
- Bulk Delivery: Conduct three tests per shipment.
- Bag Delivery: Perform one test per 50 bags, or one test if the delivery is fewer than 50 bags.
- Recycled Abrasive: Test one sample per shift on days when blast cleaning is performed.
These frequencies help ensure consistent quality control across different delivery methods and usage scenarios.
Interpreting and Reporting Results
The presence of an oil sheen or droplets on the water surface indicates contamination, and the abrasive should not be used until cleaned or replaced. When reporting results, include the following details:
- Abrasive manufacturer
- Brand name of the product
- Size designation
- Lot or batch number
- Test results (pass or fail based on oil presence)
This information ensures traceability and supports quality assurance processes.
Key Considerations
- Safety and Regulatory Compliance: Users must establish appropriate safety, health, and environmental practices and comply with regulatory limitations. ASTM D7393 does not address all safety concerns, so caution is advised.
- Other Contaminants: The oil detection test does not identify other contaminants, such as ionic or particulate matter. For those, additional methods like ASTM D4940 (Conductimetric Analysis of Water Soluble Ionic Contamination) are required. Note that the water-abrasive solution from the oil test cannot be reused for D4940 due to differences in water purity and abrasive-to-water ratios.
- International Standards: This practice aligns with principles established by the World Trade Organization Technical Barriers to Trade (TBT) Committee, ensuring global applicability.
Conclusion
Checking for oil in abrasives is a critical quality control step in abrasive blast cleaning. The ASTM D7393-16 Standard Practice provides a reliable, easy-to-implement method to detect oil contamination, helping to prevent surface preparation issues and ensure the durability of applied coatings. By following the outlined procedure, using the recommended equipment, and adhering to suggested testing frequencies, users can maintain high standards in their abrasive materials. For further details on referenced standards, visit www.astm.org or www.sspc.org.
Frequently Asked Questions (FAQs) About Checking for Oil in Abrasives
1. Why is it important to check for oil in abrasives used for blast cleaning?
Oil in abrasives can transfer to the surface being cleaned, causing contamination that leads to coating adhesion issues, film defects, and reduced performance of the coating system. According to ASTM D7393-16 (Reapproved 2020), detecting oil is a critical cleanliness test required by SSPC standards (SSPC-AB 1, AB 2, AB 3, and AB 4) to ensure the abrasive is suitable for use and to prevent costly rework.
2. What equipment and steps are needed to test for oil in abrasives?
To test for oil, you need a clear jar or bottle (at least 250 ml) with a sealing lid and potable water (20–35°C). The procedure, as outlined in ASTM D7393, involves:
- Filling the container halfway with abrasive.
- Adding water to cover the abrasive by at least 2.5 cm (1 inch).
- Shaking vigorously for one minute.
- Letting it sit for up to 5 minutes.
- Checking for oil droplets or sheen on the water surface. If oil is present, the abrasive fails and should be cleaned or discarded.
3. How often should I test abrasives for oil contamination?
The testing frequency depends on the agreement between the purchaser and seller, but ASTM D7393 suggests:
- Three tests per shipment for bulk delivery.
- One test per 50 bags for bag delivery (or one test if fewer than 50 bags).
- One sample per shift for recycled abrasives on days when blast cleaning is performed. These guidelines help ensure consistent quality control across different delivery and usage scenarios.